
Do you know that it is possible to create unlimited email addresses with Gmail?
Whether you are away or not, in this webpage we will show you the new trick we discovered from our research on how to create unlimited email addresses with a Gmail alias hack.
Moreover, there is nothing illegal with this trick, as it is quite recommended by Gmail staff for every user regardless of their country.
With this discovery, you don’t need to spend any money while creating and using infinite email addresses.
In this guide, we will take you through a step-by-step process on how to create unlimited email addresses in your Gmail account and also what you can be able to do with those newly created email addresses.
Are you in hurry? If we loved to get secure, avoid spam phishing emails, passwords & emails hacked and stop being tracked on the internet, then I will recommend this Best VPN Service to get protected
How to Create Unlimited Email Addresses Using Gmail (Step-by-Step guide)

The stages or steps that are involved in creating unlimited email addresses in Gmail can be achieved in a few steps.
Moreover, as this is a trick, it involves little brainstorming. This is to ensure that you arrive at the target goal.
Step 1: Know the Reason for Creating Unlimited Email Addresses.
You need to, first of all, know the reasons for creating unlimited email addresses. This will enable you to understand why you should create any single email address with this trick.
For example, you may decide to create an email address that you will use to receive newsletter messages from platforms that you have registered with.
Here you will be able to know whether you want to filter out newsletter spam or you want to channel some type of messages that comes from your general inbox to another location by using the filter.
Step 2: Create Assorted New Email Addresses
From our discovery, you can create new email addresses in your Gmail account by adding either a period (‘.’) or a plus symbol (‘+’) and then an additional text.
According to Gmail, you can add a period (‘.’) or a plus symbol (‘+’) just before the ‘@gmail.com’ while creating a new email address.
Regardless of the position of the period or the plus sign, any messages that will be sent to the newly created email addresses will still come to your inbox.
Below are some examples of how to create an unlimited email address by using a period (‘.’) or a plus symbol (‘+’) just before the ‘@gmail.com’
If the parent's mail address is [email protected]
When adding periods, you can create something like:
When adding a plus sign, you can create something like
Step 3: Create Filters for your Newly Created Email Addresses
The above diverse email address that we created above will not be effective until you follow our illustration in this step #3.
Now from your Gmail account, you need to create a special rule or a filter for all the new email addresses you just created in step #2 above.
To create these filters in your Gmail account, follow the sub-steps and the images we show below:
Step A: Login to your Gmail Account
Go to Gmail.com and log in with your preferred email address.
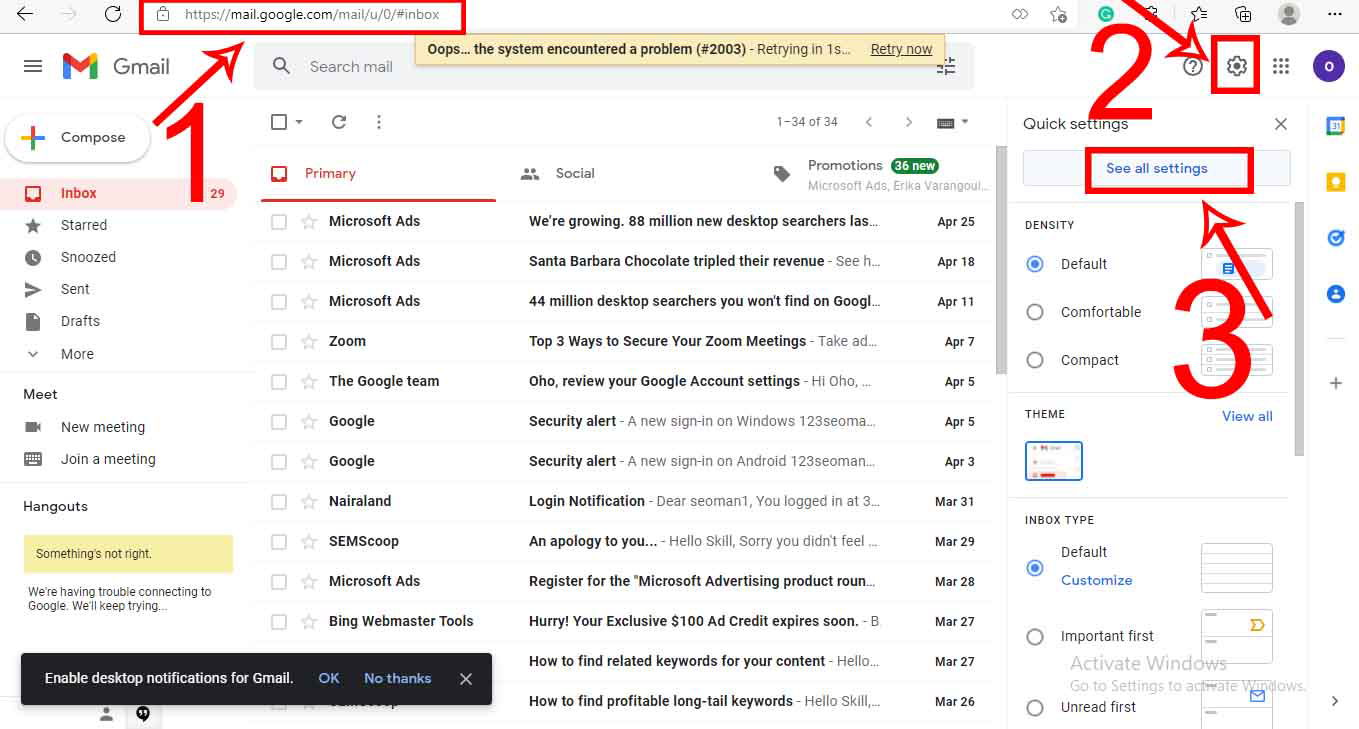
From your Gmail homepage, go to Gmail Settings and from the drop-down, click on “See all settings.” Next, look for the “Filters & Blocked Addresses” tab. See the image below for a virtual assistant.
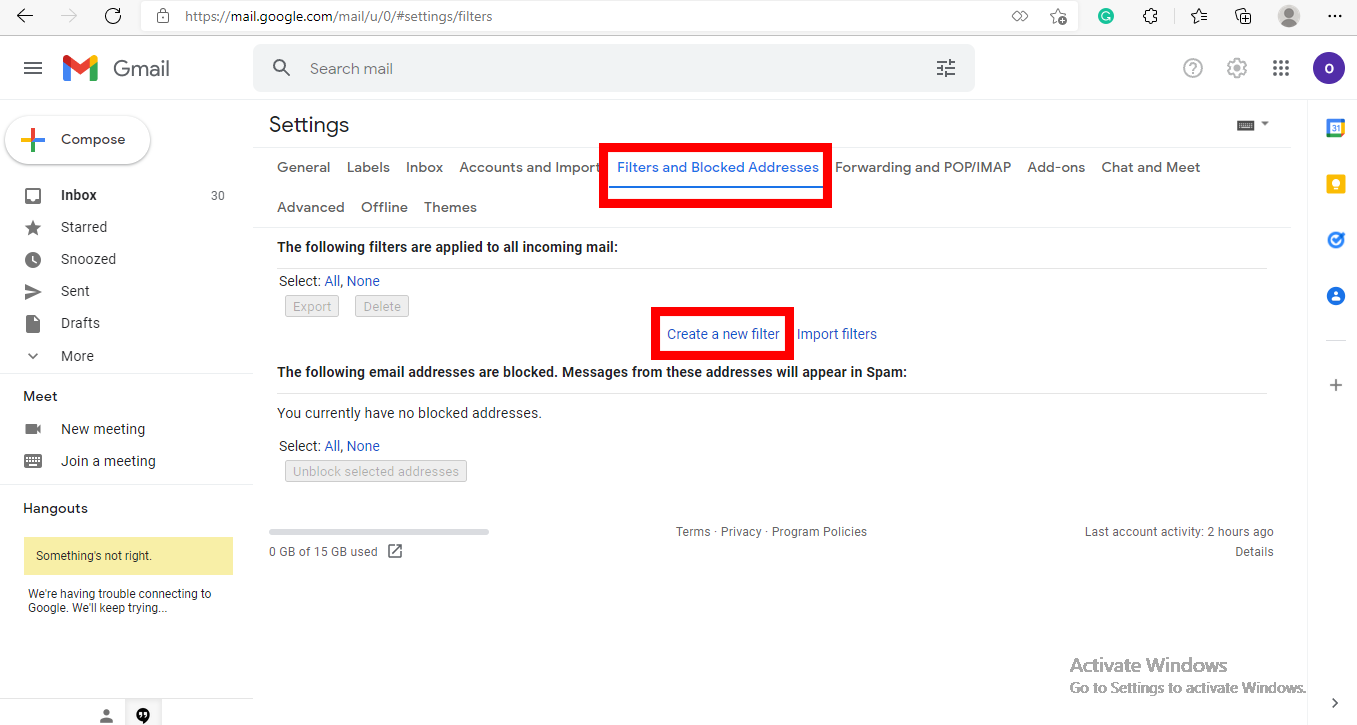
From the “Settings” tab, locate the “Filters and Blocked Addresses” tab and click on it. Next click on “Create a new filter.” See the image below.
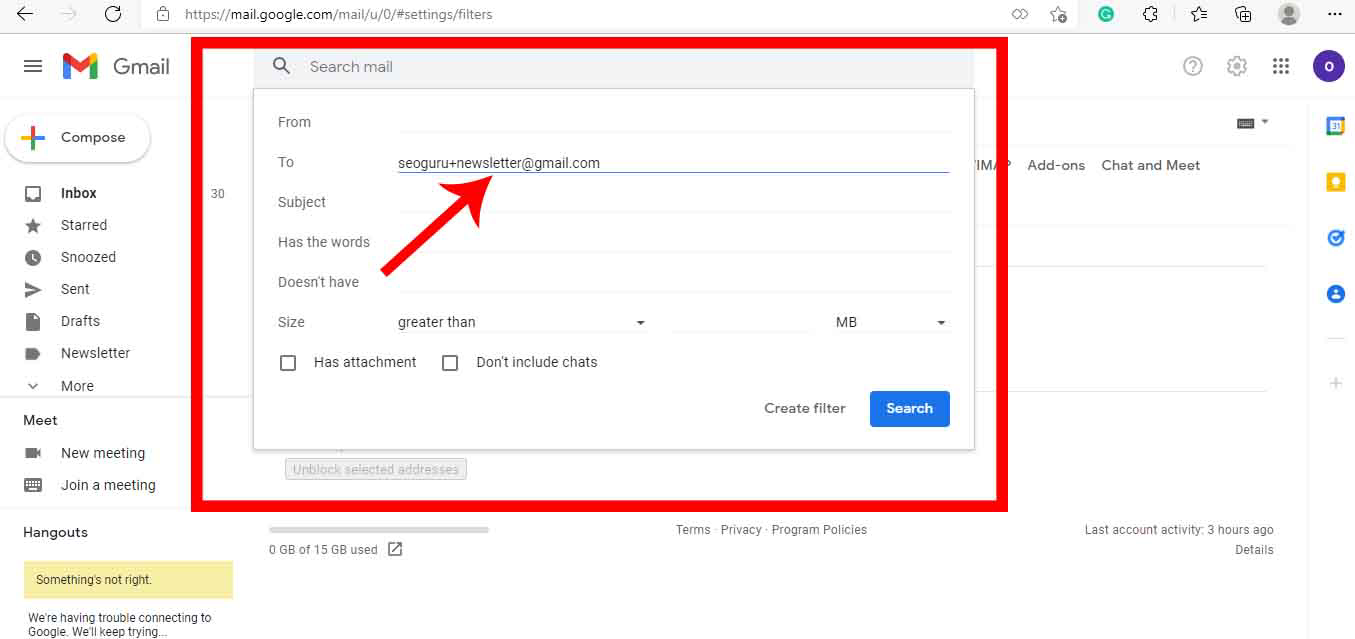
Now in the “To” form field, input the new email address that has a period or a plus sign in it.
Here I will type [email protected] and then click on “Create filter” to continue. See the image below.
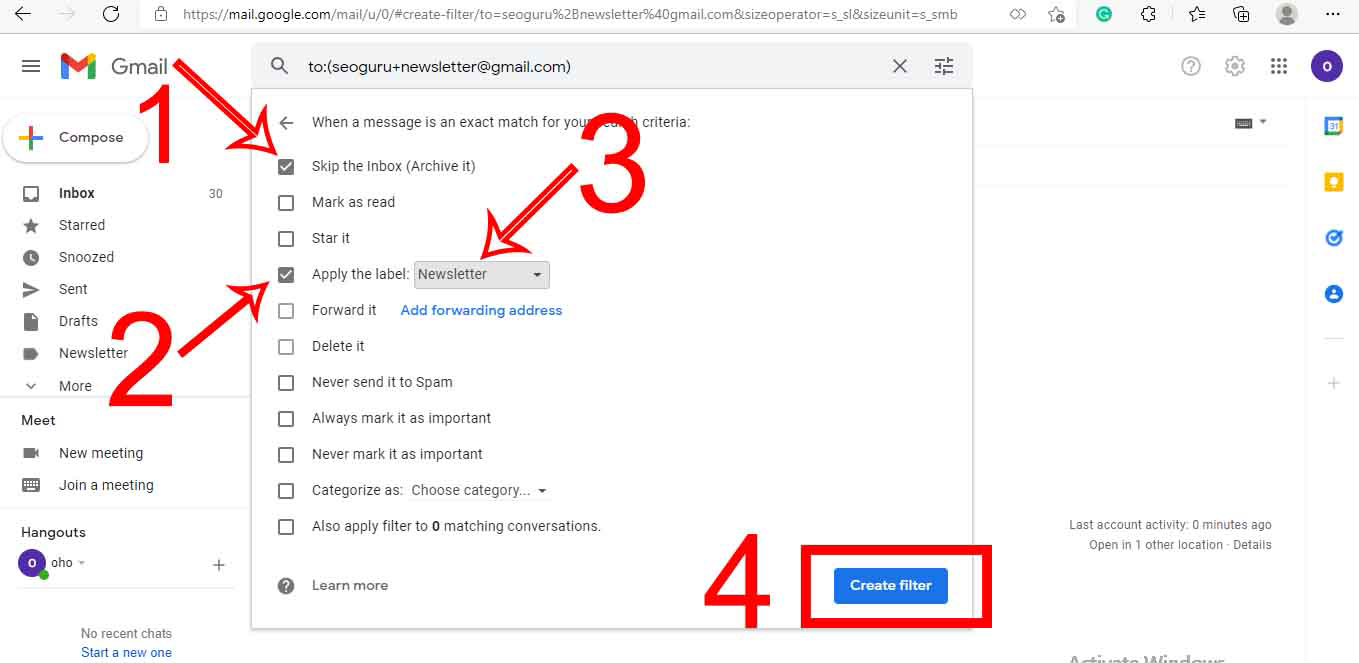
Next, check “Skip the Inbox (Archive it)” and “Apply the label.” From the drop-down in the “Apply the label,” you can create a new label and name it something like “Newsletter.” And select it.
Next click on “Create filter” to continue. See the image below.
After clicking on the “Create filter,” you will see another page showing that your new email address has been assigned for some purposes. See the image below.
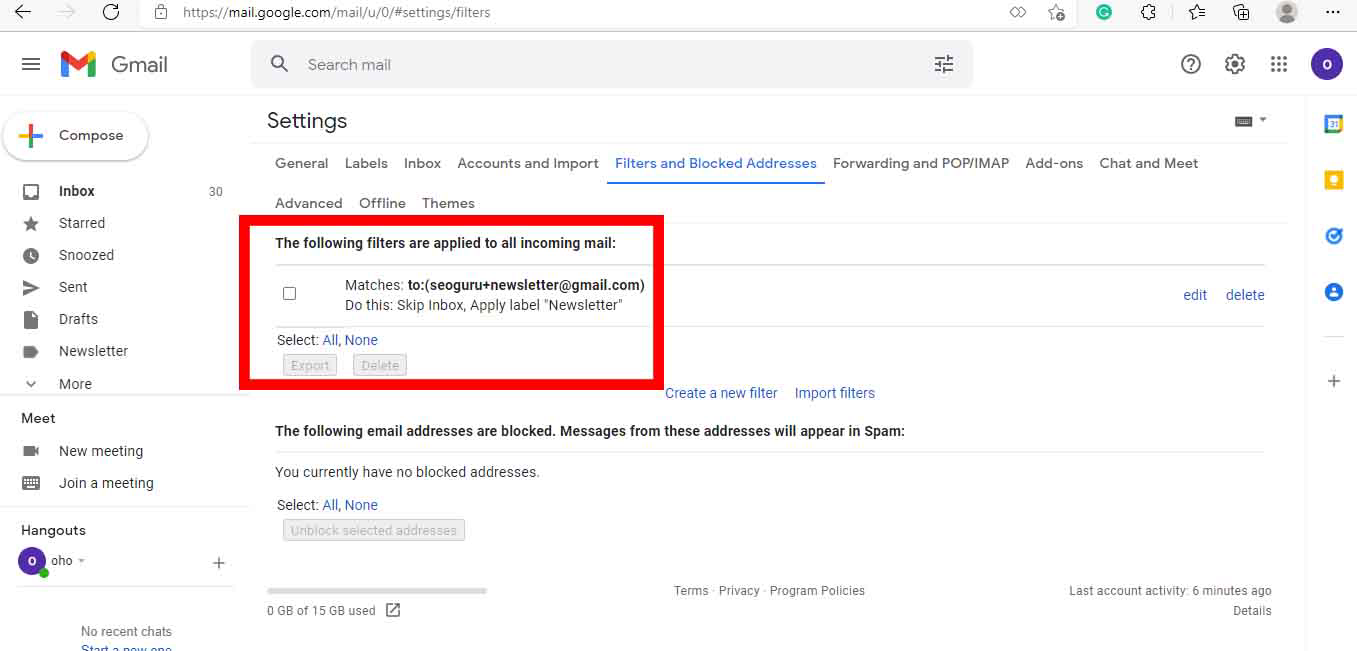
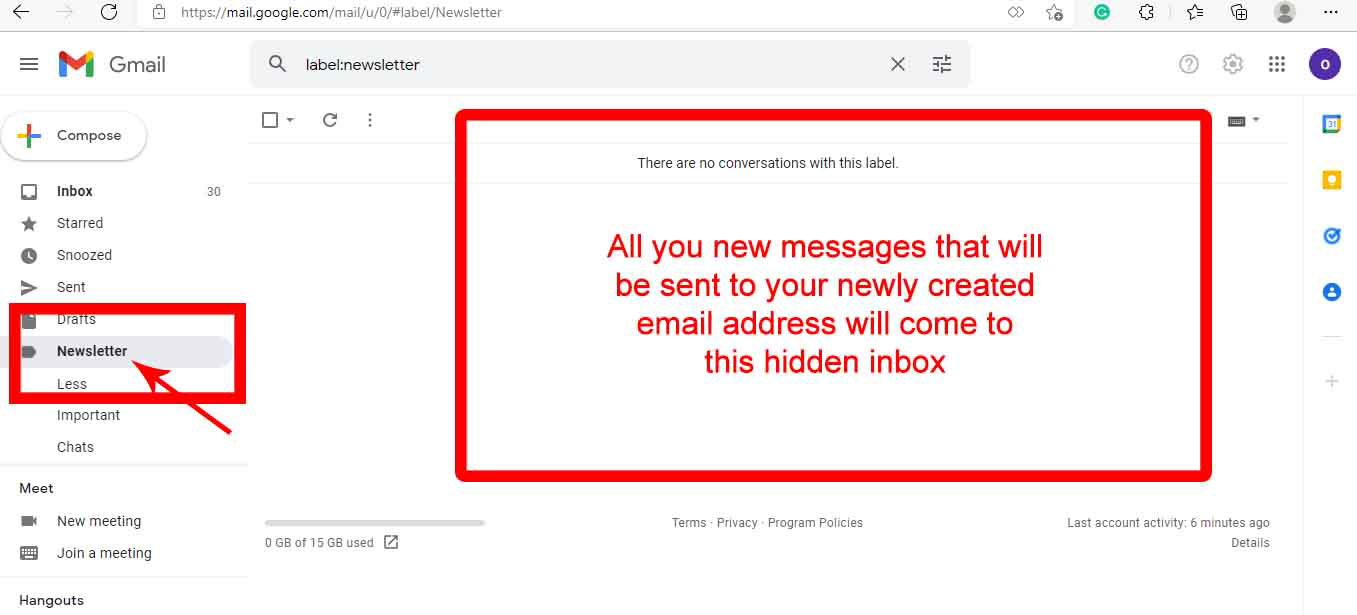
All the messages that will be sent to [email protected] (which is your newly created email address) will be sent to the label with the name “Newsletter” as we created it above.
See the image below for more understanding.
Simple Hacks to Increase Your Privacy & Security
To improve your Gmail privacy and security, follow the new security hacks that we discovered in our research.
#1. Ensure that your Device is Free from Malware
When your device is infected by malware, the chances of your account login details being exposed to hackers are very high.
This is because every malware that infects your device is caused by either software from a hacker or by other hacking tricks.
Always run a scan through your device to ensure that your device is always healthy.
#2. Choose a Strong Password for your Gmail Account
A strong password remains one of the major ways you can use to secure your account from being hacked.
A strong password is a password that includes a mix of different types of characters, including upper-case letters, lower-case letters, numbers, and special symbols, but just this alone cannot still compose a strong password.
You should ensure that your password is very hard to guess and not just this alone, ensure that not straightforward. Let it be hard to type it.
Don’t use your birthday coupled with a few letters as your password.
#3. Enable 2-Factor Authentication
With the 2-factor authentication that Google enables, you can be able to secure your account to the point that without your phone number being present with you, you cannot be able to login to your account.
Meanwhile, the hacker that may have interested to hack your account will not be able to access your phone to type in the code that Google will send to your phone each time you want to log in to your Gmail account.
Why Should You Use Gmail Alias?
One of the reasons why you should use a Gmail alias is that it helps you to sort and automatically push some specific messages that are meant to come to your inbox into a specified folder or label.
This in turn helps to manage your inbox, thereby increasing your security and the rate of spam messages that enters your email address.
When you are setting up Gmail aliases, you can be able to direct incoming emails to these aliases and to separate folders.
Another interesting reason is that when using a Gmail alias, you can be able to separate your personal and online life. You will have a sense of privacy.


Leave a Reply